Learning to move with and be moved by someone else is an amazing experience, and much easier than you think. There’s more to partner yoga than just pretty shapes and flashy Instagram posts. Don’t worry about how it looks—bring awareness to how it feels.
In this series, Daniel Scott—yogi provocateur and ambassador of trust—offers valuable insight on how to best share your movement practice with ease, accessibility, and fun. Looking to try AcroYoga with Daniel? He and other luminaries are Wanderlust presenters. Catch them at a Festival or Wanderlust event. Find out more | 2016 lineup | Buy tickets
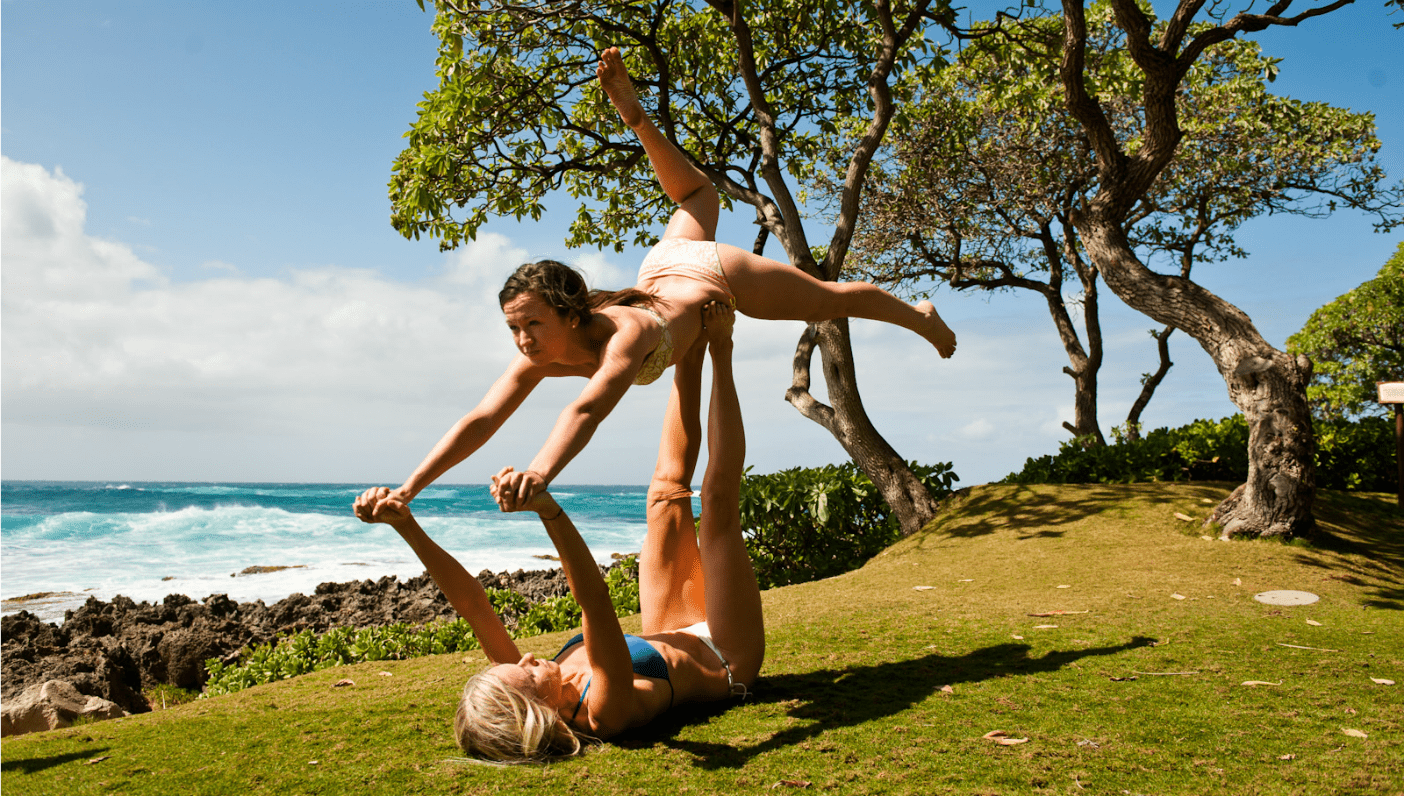
Back flying is an amazing practice that can help build trust in your movement practice, both physically and mentally. If the act of being moved through unknown space towards an unseen destination sounds exciting, read on. Terrifying, you say? No worries. We’ve got you covered there too.
Exercise 1: Reverse Plank Presses
This is a simple warm-up to get you ready to move someone else’s body with your legs, while learning to maintain body position while someone else is moving you.

This is a variation on LEG DAY exercises from other articles. Start with finding a “perfect fit” of Base’s foot arch to the curve of the Flyer’s seat. Work range of motion (as well as range of trust) by slowly moving the contact point both progressively lower and higher on the Flyer’s body.
Pro-Tip: Move slowly to build trust. Move fast to challenge it.
Exercise 2: High Flying Whale
One of the most creatively-named flying asanas, High Flying Whale is a beautiful example of using the natural balance between body weight and gravity to create lift. There is a lot of wood to chop here, so watch the GIF a few times as you read over the following steps:

Step 1: FLYER stands with heels touching BASE’s shoulders (facing away)
Step 2: BASE raises legs up with ankles flexed. FLYER places feet on their shoulders, toes towards the bottom of the shoulder blades.
Step 3: Everyone take a deep breath. (Non-negotiable!)
Step 4a: BASE asks FLYER: “Can you let me move your right foot for you without your help? Can you trust me to do that?” (Spoiler Alert: FLYER agrees while BASE gently lifts and places foot on their shoulder.)
Step 4b: Repeat second side.
Step 5: FLYER is now essentially flying (feet are technically off the ground as they stand on the front of BASE’s shoulders)
Step 6: Check in with your breathing! BASE, re-grip thumb and forefingers around FLYER’s ankles.
Step 7: BASE slowly (and I mean SLOWLY) begins to lean legs back past 90 degrees until FLYER feet become light on the shoulders. PAUSE every time you feel your partner begin to tense up—it won’t take much, so move only a couple centimeters at a time.
Step 8: BASE extends FLYER’s leg, one at a time, past head in the opposite direction of the legs leaning. This creates suspension by creating traction between the legs and spine of the FLYER.
Step 9: Congratulations! You did it, great job! (But don’t forget to keep breathing.)
Step 10: Exit slowly the way you entered, placing the FLYER’s heels back next to the BASE’s shoulders. BASE: Don’t forget to release the hold on the ankles once the foot has touched down, and feel free to help the FLYER towards standing by leaning your legs towards your face.
BASE—Keep your ankles flexed (top of the foot dropping towards navel). This creates a flat platform, lessening flexion in your partner’s upper spine and allowing them space to breathe.
FLYER—Do you best to let your partner do their job! Try to stay as relaxed as possible while remaining tone in your core to support your spine and maintain stability.
SPOTTER—Feeling unsafe? Find a friend and have them stand close by with their chest facing the ankles of the BASE, one hand hovering just below the FLYER’s head and shoulders, the other just below their middle back. Do your best to not hold or lift the FLYER during the pose. Let them figure out how to find balance themselves, stepping in to support if they lean too far away from a stable place.
Exercise 3: Low Flying Whale
The slightly less elevated, yet no less elevating, version of High Flying Whale. This is a great place to work on getting lifted without leaving the ground. Again, watch the GIF a few thousand times before attempting the following steps.

Step 1: FLYER stands by BASE’s shoulders, facing away.
Step 2: BASE stacked elbows above shoulders, bent 90 degrees. FLYER sits straight down, keeping spine stacked while making sure to actually sit on their BASE’s arms (the alternative is another conversation entirely).
Step 3: BONES STACKED, chilling out park bench style. BASE has forearms supporting FLYER’s thighs with their thumb and forefinger cradling their partner’s knee creases.
Step 4: BASE raises knees (squeezed together) just above FLYER’s waistline, extending legs towards the shoulders (ankles flexed to the torso in). FLYER, keeping hands on their thighs, begins to lean back by drawing their navel in and rounding down one vertebrae at a time.
Step 5: BASE lowers legs, maintaining support for the FLYER’s spine by keeping the knees squeezing together and checking in to make sure everyone is copacetic.
Step 6: Check in with your breathing!
Step 7: Once reclined, the BASE can remove their arms from their partner’s legs—provided they feel stable enough. FLYERS, please communicate what you need by ways of support (knees closer together if you’re falling through, lift the legs if the bend is too deep).
Step 8: BASE replaces hands, and is sure to stack the elbows under the FLYER’S sit bones before lifting the legs to stack their partner’s spine. Please note: It’s really important the the BASE’S elbows are stacked.
Step 9: FLYER stands back up once shoulders are stacked over hips.
Step 10: You did it!
Pro-Tip:
FLYERS, do your best to move with your partner and not against them. Don’t try to lift your legs up or go faster than the BASE. Practice, and all is coming.
BASES, use your bones to carry weight instead of muscles. While it may be more challenging at first, proper alignment will ensure you do less and get much more.
And, of course, a leg cross finale is totally optional!
—
 Daniel Scott is yogi provocateur offering a fresh alternative to the traditional “yoga voice”. His classes are a lively mix of balance and improv, strength and flexibility, breath and body. With light heart and open mind, Daniel focuses on moving into postures, not through them. A globally renowned ashtanga-vinyasa teacher and Certified Level 2 AcroYoga instructor, Daniel enjoys barefoot running, street art, good coffee, large quantities, and great qualities. Deeply dedicated to sharing in the immense journey from self-conscious to self-aware, Daniel Scott strives to answer the ever-present question: Are you moving or being moved?